This post is part of the series "Linux Playground From Scratch"
- Virtual Debian: A Practical Step-by-Step Guide From Scratch
- Alpine in QEMU: A Practical Guide From Scratch
- VirtualBox: Running Pre-Built Debian and Alpine Images
- Installing Debian in VirtualBox: A Step-by-Step Guide
- Termux: Your Pocket-Sized Linux on Android
- Essential Command-Line Tools for Linux: A Practical Guide
In previous posts, I explained how to set up a guest OS to run inside a virtual machine. However, you might not be able to run a VM because you lack administrator permissions, don't have sufficient hardware resources, prefer to avoid the hassle, or for any other reason. If this is your situation and you have an Android device, this post will explain how to use it as an alternative workaround.
Until the Android Virtualization Framework is globally available to run a guest Linux OS in a virtual machine, Termux is the best option for running a terminal emulator on Android. Keep in mind that it doesn't emulate or virtualize anything. Termux sets up a minimal base system that allows us to do a lot from the CLI. However, we'll be limited by the restrictions of the Android environment. For example, on a new device, you won't have root permissions unless the device has been rooted. For more information, check Termux's "Getting Started" page.
For reference, I'm using Termux version 0.118.3 and Android 15 while writing this post.
Install F-Droid
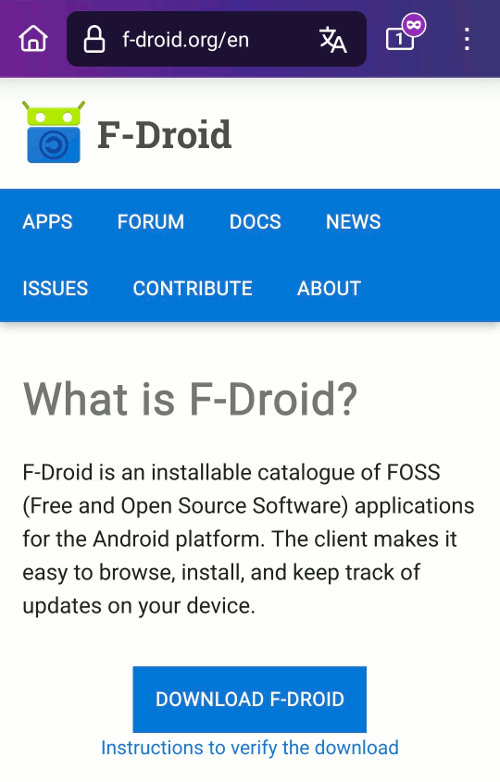
There are different ways to install Termux. Here, we'll see how to install it from F-Droid, a free and open-source app store and software repository for Android. While not strictly mandatory, we'll use the F-Droid app to install Termux and manage future updates. Below is a brief list of steps to install F-Droid, but you can check the official documentation for detailed instructions. Start by going to the F-Droid homepage and downloading the F-Droid.apk file.
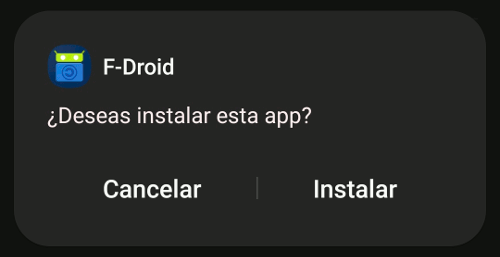
Next, install the application from the downloaded file.
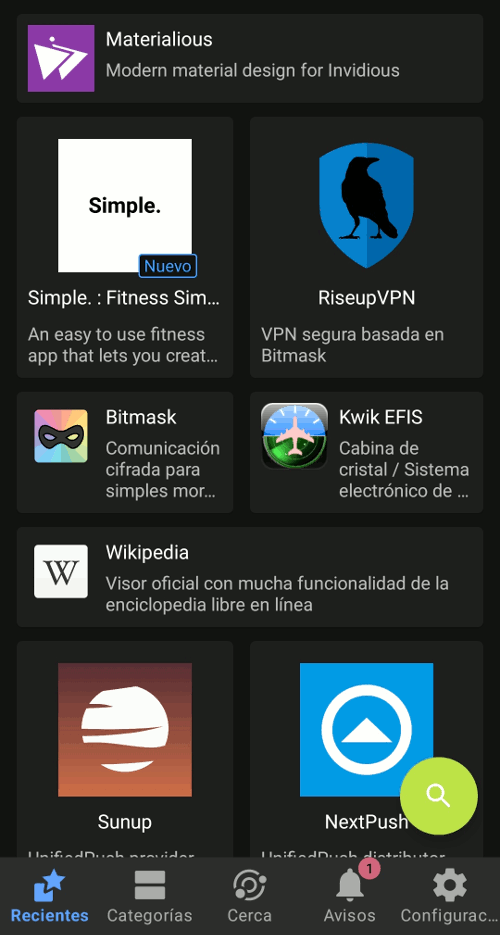
Once the installation is complete, open the app by clicking the new icon and check the applications available in the repository.

Install Termux
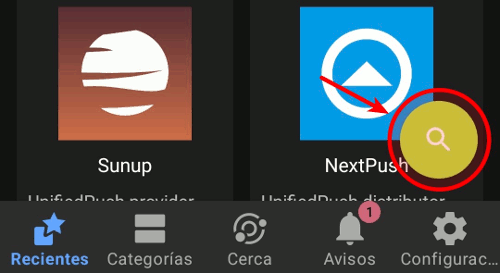
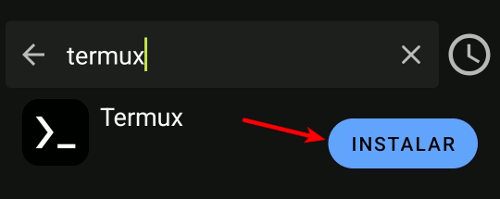
In the F-Droid app, click the search icon (magnifying glass).
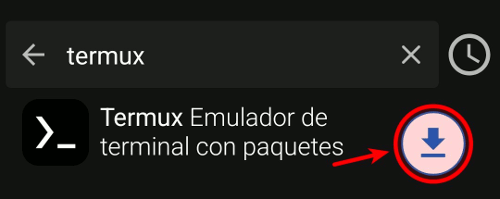
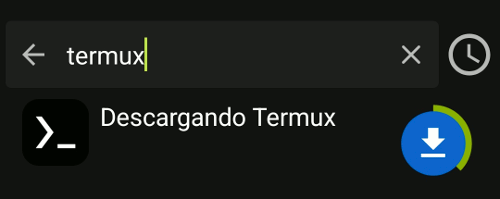
Once you're in the search screen, enter "termux" in the input field. You'll see a list of items; click the download button for the Termux (terminal emulator with packages) app.
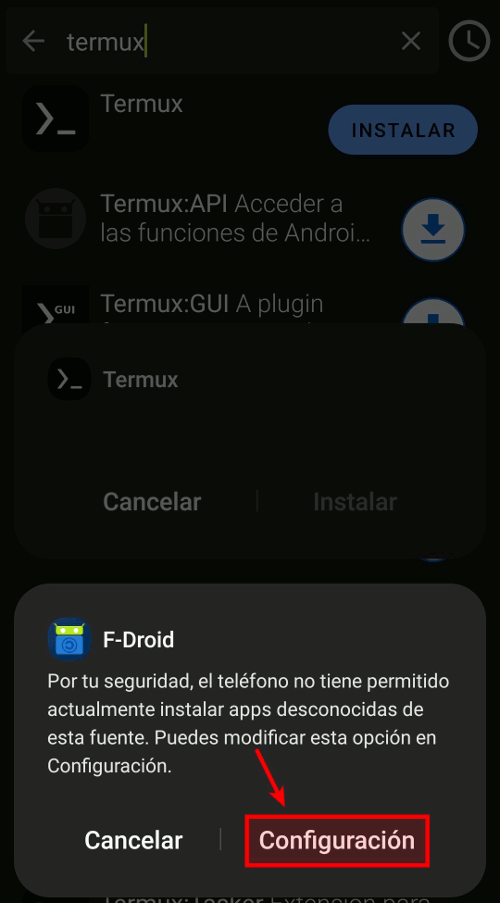
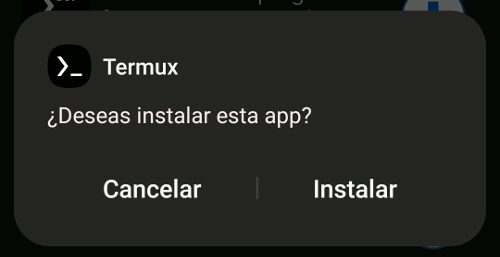
After the download finishes, F-Droid will attempt to install it automatically. If you haven't already granted the necessary permissions, allow the installation of apps from unknown sources when Android prompts you, and then hit the install button.
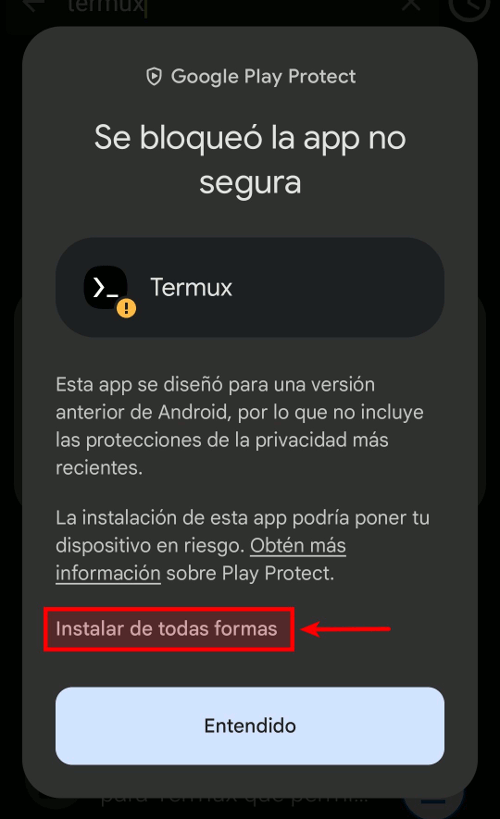
Google Play Protect might prevent you from installing Termux. This is because Termux is designed for an older version of Android (targetSdk 28), which allows it to execute arbitrary files. Newer Android versions impose restrictions that affect Termux's functionality as a Linux environment. You can read more about this here. Trust the app and ignore the warning by hitting the "install anyway" button.
After installation, click the icon and open Termux.
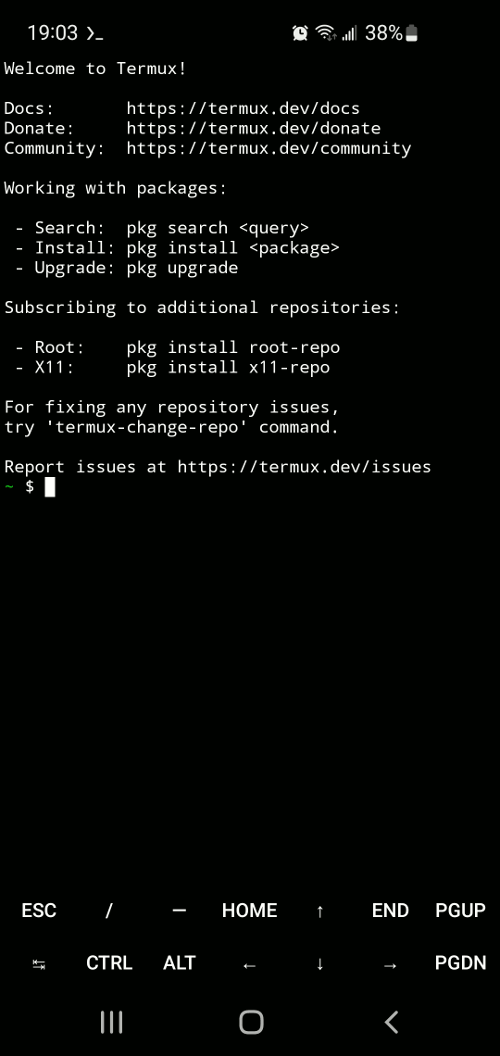
Inside Termux, I suggest running two commands as the first thing. The one below will upgrade the applications and their dependencies.
pkg upgrade
The next command will create links to access shared storage.
termux-setup-storage
It's worth mentioning the commands to trigger a wakelock: termux-wake-lock and termux-wake-unlock. These commands acquire (or release) the Termux wake lock to prevent the CPU from sleeping. This is useful when you want an app running in the background without being interrupted by the Android lock screen.
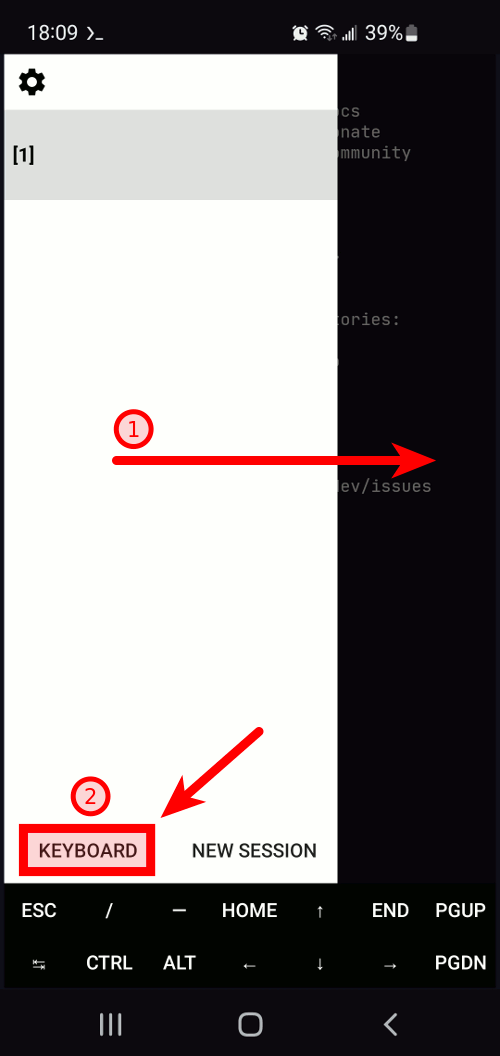
You might want to hide the virtual keyboard or the toolbar. To do this, swipe from the left side of the screen to open the navigation drawer. Then, press the "keyboard" button to toggle the visibility of the virtual keyboard, or long-press to toggle the visibility of the terminal toolbar. For more information, check the user interface documentation.
Termux Appearance
Next, I'll explain two ways to change the appearance of Termux: through the font and colors. Changing the font size is as simple as pinch-zooming on the screen.
Plugin
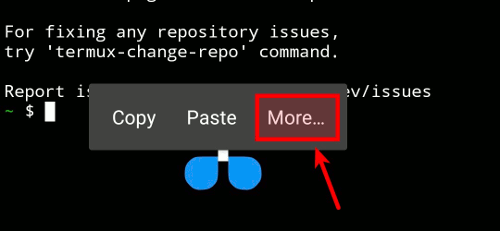
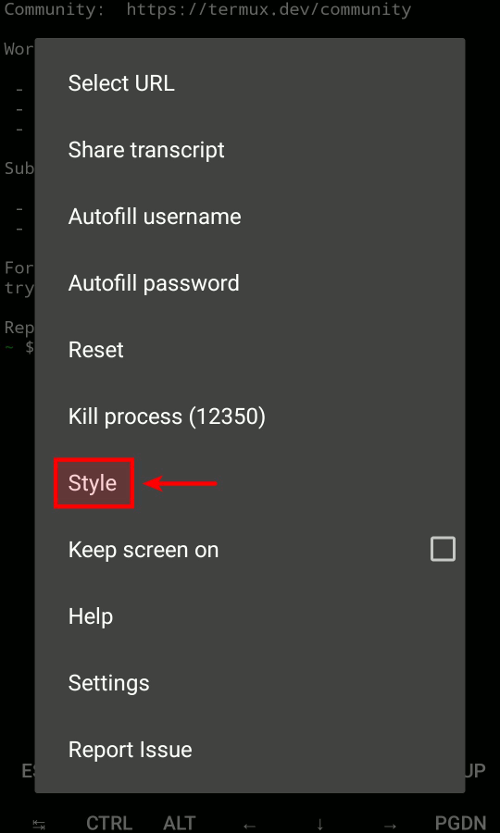
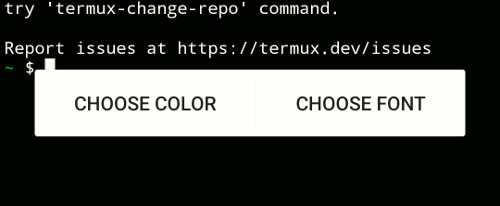
The first way is through the official Termux:Styling plugin. Install it the same way you installed Termux. After installing the plugin, long-press on the screen and select the "More..." button, which will open a longer menu where you select the "Style" option. You'll then see two buttons that allow you to change the colors and/or the font.
For example, you can try the Argonaut color scheme and the Jetbrains Mono font.
Manually
You can change the colors by updating the colors.properties file and running the termux-reload-settings command afterward. Below is an example with the command to set the dark mocha theme from the catppuccin project.
cat > $HOME/.termux/colors.properties <<HEREDOC && termux-reload-settings
# Catppuccin Mocha theme for Termux
# Based on the official Catppuccin palette (https://github.com/catppuccin/palette).
# With assistance from Google Gemini.

# --------------------------------------
# Primary colors
# --------------

background=#1E1E2E
foreground=#CDD6F4

# --------------------------------------
# Black (ANSI 0-7)
# ----------------

# Surface1
color0=#45475A
# Red
color1=#F38BA8
# Green
color2=#A6E3A1
# Yellow
color3=#F9E2AF
# Blue
color4=#89B4FA
# Pink
color5=#F5C2E7
# Teal
color6=#94E2D5
# Subtext1
color7=#BAC2DE

# --------------------------------------
# Bright colors (ANSI 8-15)
# -------------------------

# Surface2
color8=#585B70
# Bright Red (same as Red)
color9=#F38BA8
# Bright Green (same as Green)
color10=#A6E3A1
# Bright Yellow (same as Yellow)
color11=#F9E2AF
# Bright Blue (same as Blue)
color12=#89B4FA
# Bright Pink (same as Pink)
color13=#F5C2E7
# Bright Teal (same as Teal)
color14=#94E2D5
# Subtext0
color15=#A6ADC8
HEREDOC
If you prefer light colors, below is the command to set the latte theme.
cat > $HOME/.termux/colors.properties <<HEREDOC && termux-reload-settings
# Catppuccin Latte theme for Termux
# Based on the official Catppuccin palette (https://github.com/catppuccin/palette).
# With assistance from Google Gemini.

# --------------------------------------
# Primary colors
# --------------

background=#EFF1F5
foreground=#4C4F69

# --------------------------------------
# Black (ANSI 0-7)
# ----------------

# Surface1
color0=#BCC0CC
# Red
color1=#D20F39
# Green
color2=#40A02B
# Yellow
color3=#DF8E1D
# Blue
color4=#1E66F5
# Pink
color5=#EA76CB
# Teal
color6=#179299
# Subtext1
color7=#5C5F77

# --------------------------------------
# Bright colors (ANSI 8-15)
# -------------------------

# Surface2
color8=#ACAFBE
# Bright Red (same as Red)
color9=#D20F39
# Bright Green (same as Green)
color10=#40A02B
# Bright Yellow (same as Yellow)
color11=#DF8E1D
# Bright Blue (same as Blue)
color12=#1E66F5
# Bright Pink (same as Pink)
color13=#EA76CB
# Bright Teal (same as Teal)
color14=#179299
# Subtext0
color15=#6C6F85
HEREDOC
Once you've set the colors, you can proceed to set a font. Below is an example of the commands you need to run to install the JetBrains font from Nerd Fonts, a project that patches fonts with a large number of glyphs (icons).
Let's start by downloading the JetBrains package.
curl -LO 'https://github.com/ryanoasis/nerd-fonts/releases/download/v3.4.0/JetBrainsMono.zip'
Then, remove the font you're currently using. This is important because otherwise the app will crash (see issues 3473).
rm -f $HOME/.termux/font.ttf
Now you can set the font version you like the most. The next command will set the regular mono font with ligatures.
unzip -p JetBrainsMono.zip JetBrainsMonoNerdFontMono-Regular.ttf > $HOME/.termux/font.ttf
If you don't like ligatures, use the following command to set the font without them.
unzip -p JetBrainsMono.zip JetBrainsMonoNLNerdFontMono-Regular.ttf > $HOME/.termux/font.ttf
After installing the font, run the command below to reload the settings.
termux-reload-settings
Once you're satisfied with the results, remove the font's package to free up some space.
rm JetBrainsMono.zip
Secure Shell (SSH)
If you've installed Termux on a mobile device and find the screen uncomfortable to read due to its small size, or if you don't have a physical keyboard and typing with the virtual keyboard isn't pleasant, you can use a computer to remotely access Termux through an SSH connection. To do this, we'll follow a series of steps, from installation to setting up public key authentication. SSH will also be used in the next section to access an emulated machine.
Install
Let's start by running the next command to install OpenSSH.
pkg install openssh
Next, we're going to set the configuration file. But first, back up the default configuration file with the following command.
mv $PREFIX/etc/ssh/sshd_config $PREFIX/etc/ssh/sshd_config.bkp
Now, set the configuration file for OpenSSH. The command below will do it. This is a simple configuration that enables password and key login just for the current user (although defining the user isn't strictly necessary) and enables Secure File Transfer Protocol.
cat > $PREFIX/etc/ssh/sshd_config <<HEREDOC
###############################
# SSHD configuration for Termux
###############################

# Allow client to pass locale environment variables
AcceptEnv LANG LC_*

# Block root user login
DenyUsers root
DenyGroups root
PermitRootLogin no

# Allow just Termux user
AllowUsers $(whoami)

# Disabled host based authentication
HostbasedAuthentication no
# Don't read the user's ~/.rhosts and ~/.shosts files
IgnoreRhosts yes
# Server disconnects if the user has not successfully logged in (seconds)
LoginGraceTime 120
# Check file modes and ownership of the user's files and home directory before
# accepting login.
StrictModes yes

# Password based logins are disabled
# Only public key based logins are allowed
#AuthenticationMethods publickey

# Enable public key authentication and set keys file
PubkeyAuthentication yes
AuthorizedKeysFile %h/.ssh/authorized_keys

# Change to no to disable tunnelled clear text passwords
PasswordAuthentication yes
# To enable empty passwords, change to yes (NOT RECOMMENDED)
PermitEmptyPasswords yes
# Change to yes to enable challenge-response passwords
# (beware issues with some PAM modules and threads)
ChallengeResponseAuthentication no

# Extra security options
AllowTcpForwarding no
TCPKeepAlive yes
X11Forwarding no
X11DisplayOffset 10
PrintMotd no

# Configure external sybsystem
# @see http://serverfault.com/a/660325
Subsystem sftp $PREFIX/libexec/sftp-server
HEREDOC
Now you can start an SSH server to access Termux from an external computer. Below is a command to create a small and simple script to start the SSH server. This script will first run termux-wake-lock to prevent the CPU from sleeping, then it will print some values to configure the SSH client on the other machine, and lastly, it will start the SSH server without detaching and becoming a daemon (you'll see the logs on the screen). The script is just a wrapper to automate some steps; you can update it to your liking or just start the daemon with the sshd command and stop it with the pkill sshd command.
cat > $PREFIX/bin/sshd-custom <<HEREDOC && chmod u+x $PREFIX/bin/sshd-custom
#!$PREFIX/bin/bash

# Release the CPU before exit
cleanup() {
  termux-wake-unlock
  echo "...bye!"
}

# Catch Ctrl+C signal and call 'cleanup' function
trap cleanup SIGINT

# Prevent the CPU from sleeping
termux-wake-lock

TERMUX_SSHD_IP=\$(ifconfig 2>/dev/null | grep inet | grep -v 127.0.0.1 | grep -o -E 'inet [0-9\.]+' | cut -d' ' -f2 | tail -n1 | xargs)
TERMUX_SSHD_USER=\$(whoami)
TERMUX_SSHD_PORT=\${1:-8022}

echo "=========================="
echo "  List of sshd Variables  "
echo "=========================="
echo
printf "* %4s: %-20s\n" "USER" "\${TERMUX_SSHD_USER}"
printf "* %4s: %-20s\n" "IP" "\${TERMUX_SSHD_IP}"
printf "* %4s: %-20s\n" "PORT" "\${TERMUX_SSHD_PORT}"
echo

# Start ssh daemon
sshd -D -e -p \$TERMUX_SSHD_PORT
HEREDOC
Run the script with the sshd-custom command, and you'll see output like the next example.
==========================
  List of sshd Variables
==========================

* USER: u0_a662
*   IP: 192.168.0.244
* PORT: 8022

Server listening on :: port 8022.
Server listening on 0.0.0.0 port 8022.
Then use the previous values in the computer where you'll run the SSH client. From now on, to reduce confusion, I'm going to use the below variables that represent the USER, IP, and PORT. Feel free to adapt the commands with your values or set the variables and reuse the commands as they are.
TERMUX_USER="u0_a662"
TERMUX_IP="192.168.0.244"
TERMUX_PORT="8022"
The sshd-custom script accepts a parameter with the desired port that you would like to use for the SSH server (8022 by default). For example, if you want to use port 2222, call the script like this: sshd-custom 2222.
Password Authentication
One way to authenticate and access Termux through the SSH protocol is by using a password. This will also be needed if you want to use public key authentication (next section). First, define a password in Termux using the next command.
passwd
Now you can access Termux, through the SSH protocol, from your computer using the following SSH (client) command. If you're using a different client, like PuTTY, check the documentation to connect.
ssh -p $TERMUX_PORT "${TERMUX_USER}@${TERMUX_IP}"
Public Key Authentication
An alternative to password authentication is using public-key cryptography. First, generate the pair of public and private keys on the client machine (for example: your computer). The following command will create the keys using the Ed25519 algorithm. The use of the RSA algorithm is discouraged and deprecated since OpenSSH 8.2.
ssh-keygen -t ed25519 -C "ssh@termux" -f ~/.ssh/for_termux
Next, upload the public key from the client machine (your computer) to the SSH server (your Android device) using the next command.
ssh-copy-id \
  -i ~/.ssh/for_termux \
  -p $TERMUX_PORT "${TERMUX_USER}@${TERMUX_IP}"
After the key is uploaded to the server, you'll be able to access Termux using public key authentication. The next command will do it, and the main difference with the password authentication command is the -i ~/.ssh/for_termux parameter that selects the private key for authentication.
ssh \
  -i ~/.ssh/for_termux \
  -p $TERMUX_PORT "${TERMUX_USER}@${TERMUX_IP}"
Once you have successfully connected to Termux through SSH using the previous command, you can update the SSH server's configuration file to disable password authentication and enable only public key authentication. The next command will do the trick, assuming that the configuration file is the one you created previously.
ed $PREFIX/etc/ssh/sshd_config <<HEREDOC
28s/^#//
35s/yes$/no/
wq
HEREDOC
Now you can disable the user's password, and then password authentication, by running the next command.
passwd -d
For the changes to take effect, restart the SSH server. Stop it with pkill sshd and then start it again.
Computer Emulation
With Termux, you can do a lot, but, as I mentioned at the beginning of this post, you'll be limited by the Android device. One of these limitations is that you won't be able to run containers.
A workaround for these limitations is to emulate a full computer system that runs a full operating system without restrictions. For the emulation, we're going to use QEMU and install Alpine Linux on the emulated computer, which is designed to be small and simple.
I have been using the word "emulation" because we don't currently have the technologies to virtualize a machine. QEMU will emulate a selected architecture, which has a performance cost because it needs to translate the instructions from the emulated architecture to the host architecture. We're going to choose the x86 architecture because it works relatively well and we can reuse the instructions we already know to install Alpine Linux.
To see if your device can emulate a machine decently, I have run a series of benchmarks that can be used as a reference. You can run the benchmarks under the device section to get an idea if it's worth continuing with the emulation process by comparing your numbers with mine. To summarize the results of my benchmarks, the performance of the S10 device is mediocre, while the performance of Tab S8+ is acceptable, and the performance of S24 is decent.
QEMU
If the benchmark results were good, or if you just want to proceed with the emulation, start by installing the software needed for emulation. Run the following command to install QEMU and other needed packages.
pkg install qemu-utils qemu-common qemu-system-x86-64-headless
Alpine Linux
I have already described the process to Install Alpine Linux. You can reuse the same process here, except for how you call the QEMU command.
Start by following the instructions from the post, but ignore the "GPG" validation section under Files Integrity and Authenticity.
When you reach the Install Alpine Linux section, don't run the QEMU command; instead, run the one below this paragraph. The main difference between the two commands is the use of the Kernel-based Virtual Machine (KVM) feature, which is not available in Termux.
qemu-system-x86_64 \
  -m 1024 \
  -cpu max \
  -accel tcg,thread=multi,tb-size=256 \
  -device virtio-net,netdev=net0 \
  -netdev user,id=net0,hostfwd=tcp::2222-:22 \
  -cdrom "${ALPINE_CD_FILE}" \
  -drive if=virtio,format=qcow2,file="${GUEST_IMAGE_FILE}" \
  -nographic
After the previous command, continue with the Alpine Linux post until you reach the Run Alpine Linux section and, again, don't run the command from the post; instead, run the one below this paragraph.
qemu-system-x86_64 \
  -m 1024 \
  -cpu max \
  -accel tcg,thread=multi,tb-size=256 \
  -device virtio-net,netdev=net0 \
  -netdev user,id=net0,hostfwd=tcp::2222-:22 \
  -drive if=virtio,format=qcow2,file="${GUEST_IMAGE_FILE}" \
  -nographic \
  -display none
Then you can continue with the Alpine Linux post. Since we're only using the emulated system under Termux, there's no need to follow the steps in the last section, Convert Disk Image, so you can ignore them. But, as a safety measure, you can back up the disk image with the next command.
xz -k -6e "${GUEST_IMAGE_FILE}"
In the previous QEMU commands, I used the accelerator parameter -accel tcg,thread=multi,tb-size=256 based on the benchmarks in the QEMU & Alpine Linux section. Feel free to run your own benchmarks to see if a different option performs better on your device.
Turn On
Now that Alpine Linux is ready, you can start it with the next command. Keep in mind that I have set the parameter to daemonize QEMU, meaning that the process will run in the background.
qemu-system-x86_64 \
  -m 1024 \
  -cpu max \
  -accel tcg,tb-size=256 \
  -device virtio-net,netdev=net0 \
  -netdev user,id=net0,hostfwd=tcp::2222-:22,hostfwd=tcp::2375-:2375 \
  -drive if=virtio,format=qcow2,file="${GUEST_IMAGE_FILE}" \
  -display none \
  -daemonize
After starting the system, wait until it finishes booting. If you want a visual notification to know when the system is ready, run the following command (based on this and this answers) that will tell you when the SSH server is ready to accept a connection.
while (true); do \
  echo -n '.'; \
  timeout 1 bash -c 'cat < /dev/null > /dev/tcp/localhost/2222' &> /dev/null; \
  if (( 0 == $? )); then \
    echo -n "[PORT 2222 READY]" && break; \
  else \
    sleep '0.5s'; \
  fi; \
done; \
while (true); do \
  echo -n '.'; \
  timeout 1 ssh -o ConnectTimeout=1 -o PubkeyAuthentication=no -o PasswordAuthentication=no -o KbdInteractiveAuthentication=no -o ChallengeResponseAuthentication=no -o StrictHostKeyChecking=no -o UserKnownHostsFile=/dev/null -o BatchMode=yes -T -q -p 2222 admin@localhost &> /dev/null; \
  if (( 255 == $? )); then \
    echo -n "[SSH READY]" && echo && break; \
  else \
    sleep '0.5s'; \
  fi; \
done
At this point, you have Alpine Linux up and ready to use. Don't shut it down, because you need it on for the next sections.
Setup SSH Keys
Now that you have a working emulated system with Alpine Linux running, you're going to access it frequently. To ease this flow, use the public-key authentication feature to avoid writing the password every time you want to access Alpine Linux or run a command on it.
The first step is to create the pair of public and private keys (without password) in Termux.
ssh-keygen -t ed25519 -C "user@termux" -f ~/.ssh/for_alpine
Then set the SSH (client) configuration with the next command. Note the RemoteForward option, which you're going to use later.
cat > ~/.ssh/config <<HEREDOC
Host alpine
  User admin
  Hostname 127.0.0.1
  Port 2222
  IdentityFile $(echo ~/.ssh/for_alpine)
  LogLevel QUIET
  # Reverse SSH Tunnel
  RemoteForward 9000 localhost:8022
  # The following options are insecure but practical for use
  # with local, disposable virtual machines where security
  # is not a concern.
  StrictHostKeyChecking no
  UserKnownHostsFile /dev/null
HEREDOC
Now upload your public key into Alpine Linux.
ssh-copy-id -i ~/.ssh/for_alpine alpine
You can check if everything has been set correctly by running the following command, where the output should be admin (or the username you have chosen when you installed Alpine). Here, you're using SSH (client) just to run the command whoami inside Alpine Linux, without opening a remote shell, and then you see the command's output in your terminal.
ssh alpine 'whoami'
Using your new SSH setup and following the same pattern, but in reverse, now create a pair of public and private keys (without password) inside Alpine Linux.
ssh alpine 'ssh-keygen -t ed25519 -C "user@alpine" -f ~/.ssh/for_termux'
Then set Alpine's public key as an authorized key in Termux.
ssh alpine 'cat ~/.ssh/for_termux.pub' >> ~/.ssh/authorized_keys
Now, set the SSH (client) configuration in Alpine Linux to connect to Termux. Note that you're using port 9000, which relates to the previous RemoteForward setting.
ssh alpine "printf 'Host termux\n Hostname 127.0.0.1\n User $(whoami)\n Port 9000\n LogLevel QUIET\n IdentityFile /home/admin/.ssh/for_termux\n StrictHostKeyChecking no\n UserKnownHostsFile /dev/null\n' > ~/.ssh/config"
Lastly, update the SSH (server) configuration in Alpine Linux and restart the daemon. These updates, plus the RemoteForward on port 9000, will allow you to do a Reverse SSH Tunnel.
ssh alpine "sudo sed -i -e 's/^GatewayPorts no/GatewayPorts yes/' -e 's/^AllowTcpForwarding no/AllowTcpForwarding yes/' /etc/ssh/sshd_config && sudo rc-service sshd restart"
Docker
As I said in the introduction, Termux will be limited by the device. That's why, to run Docker, you have emulated a computer and installed Alpine Linux on it. But, in its current state, it's quite uncomfortable to log in to Alpine every time you want to run a Docker command. During the setup of Alpine Linux, you exposed port 2375, which allows a Docker client to interact with the Docker daemon.
At the time of writing this post, I couldn't find a Docker client in the packages repository (pkg search docker). So, you're going to download and install the official Docker CLI Client with the following command (based on this answer).
DOCKER_URL=https://download.docker.com/linux/static/stable/aarch64 && \
DOCKER_VERSION="$(ssh alpine 'docker --version' | grep -o -e '[0-9]\{1,2\}\.[0-9]\{1,2\}\.[0-9]\{1,2\}')" && \
curl -fsSL "${DOCKER_URL}/docker-${DOCKER_VERSION}.tgz" | \
tar zxvf - --strip 1 -C $PREFIX/bin docker/docker
Check if the docker command and the connection to the daemon are working by running the next command.
DOCKER_HOST='tcp://localhost:2375' docker version
The output of the previous command should be something like the text below.
Client:
 Version:           27.3.1
 API version:       1.47
 Go version:        go1.22.7
 Git commit:        ce12230
 Built:             Fri Sep 20 11:38:50 2024
 OS/Arch:           linux/arm64
 Context:           default

Server:
 Engine:
  Version:          27.3.1
  API version:      1.47 (minimum version 1.24)
  Go version:       go1.23.9
  Git commit:       41ca978a0a5400cc24b274137efa9f25517fcc0b
  Built:            Thu May  8 20:02:17 2025
  OS/Arch:          linux/amd64
  Experimental:     false
 containerd:
  Version:          v2.0.0
  GitCommit:        207ad711eabd375a01713109a8a197d197ff6542
 runc:
  Version:          1.2.2
  GitCommit:        7cb363254b69e10320360b63fb73e0ffb5da7bf2
 docker-init:
  Version:          0.19.0
  GitCommit:
There are different ways to tell Docker where the daemon is located. One is through the environment variable you used in the previous command. Another is using a Docker context. Let's define the alpine context with the next command.
docker context create alpine --docker "host=tcp://localhost:2375"
You can check it by using the newly created context and calling the version command, where you should see the same output as before.
docker --context alpine version
If the command worked as expected, move forward and set it as the default context.
docker context use alpine
Then, run a container from the hello-world image to confirm that everything is working fine.
docker run hello-world
SSHFS
At some point, you might want to share files between Termux and your emulated system with Alpine Linux. This might be needed if you want to do a bind mount with Docker, for example.
One solution, taking advantage of the previous reverse tunnel, is to use SSH Filesystem (SSHFS).
Let's start by creating a workspace directory in the user's home directory of both Termux and Alpine.
mkdir ~/workspace && ssh alpine 'mkdir ~/workspace'
Then, install some needed packages in Alpine to be able to mount your shared directory.
ssh alpine 'sudo apk add --no-cache --no-interactive sshfs && echo fuse | sudo tee -a /etc/modules && sudo modprobe fuse'
Now, with the following command, mount the workspace directory from Termux in Alpine. The -f option requests SSH to go to the background because it will keep acting as a server.
ssh -f alpine "sshfs -o idmap=user termux:$(echo ~)/workspace /home/admin/workspace"
To test if the shared directory is working, create a file from Alpine and display the content from Termux.
ssh alpine 'echo "From Alpine: $(uname -a)" > ~/workspace/test.txt' && cat ~/workspace/test.txt
And also, do it the other way around.
echo "From Termux: $(uname -a)" >> ~/workspace/test.txt && ssh alpine 'cat ~/workspace/test.txt'
When you want to stop sharing the directory, unmount it by running the next command.
ssh alpine 'sudo umount ~/workspace'
Virtual Hosts
If you're going to use Termux for web development, at some point you'll need to work with different hostnames. Normally, you would just update the hosts file, but this isn't possible on Android.
As a workaround for the Android restriction, install the Virtual Hosts application.
This application lets you set hostnames on Android in VPN mode. To make it work, create a file with content like the next example and load the file with the application.
cat > ~/storage/downloads/hosts.txt <<HEREDOC
127.0.0.1 localhost
127.0.0.1 .wildcard.local
127.0.0.1 www.example.local
HEREDOC
If you load the file from the previous example, you'll be able to ping a subdomain from the wildcard domain, like the command below.
ping -c 5 subdomain.wildcard.local
Now let's try to access an HTTP server through a hostname from the previous example. For this, run a container from the Tiny Hello World HTTP image.
docker run \
  --detach \
  --env HOST=0.0.0.0 \
  --env PORT=80 \
  --publish 8080:80 \
  --name hello \
  --rm \
  ghcr.io/kljensen/hello-world-http
Then, run the following command to create an SSH tunnel that will allow you to access the published port 8080 inside Alpine Linux from port 8000 on your host device (Android).
ssh -f -N -L 8000:localhost:8080 alpine
If everything works, you can see the "hello world" output by running the next command.
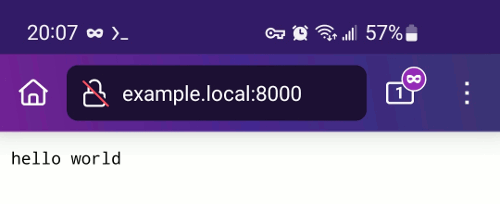
echo $(curl -s www.example.local:8000)
You should also see the same output by entering the hostname and port in your web browser, as in the next screenshot.
If you want to see the logs that the HTTP server leaves every time a client makes a request, you can do it with the following command.
docker logs hello
Once you finish your tests, turn off the emulated computer by running the following command.
ssh alpine 'sudo poweroff'
Benchmarks
In this section, I'm going to run a series of benchmarks that, I hope, will work as a reference. I'm going to use hyperfine to get the metrics. Let's install it by running the next command.
pkg install hyperfine
The devices I have used for the benchmarks are (ordered from slowest to fastest):
- Samsung Galaxy S10e (SM-G970U1)
- Samsung Galaxy Tab S8+ (SM-X800)
- Samsung Galaxy S24 (SM-S921U1)
Device
Here, we're going to get the metrics for the performance of the devices when running a series of commands in Termux. Of course, there are many ways to do this; you'll see many suggestions here. But below is the command we're going to use for our benchmark.
hyperfine \
  --warmup 2 \
  --export-markdown benchmark.md \
  --command-name "gzip random" \
  --command-name "gzip zeros" \
  --command-name "zero 2 null" \
  --command-name "zero 2 file" \
  --command-name "file 2 null" \
  "cat </dev/urandom | head -c 100M | gzip >/dev/null" \
  "cat </dev/zero | head -c 100M | gzip >/dev/null" \
  "dd if=/dev/zero of=/dev/null bs=1M count=1024" \
  "dd if=/dev/zero of=testfile bs=1M count=100 oflag=direct,sync" \
  "dd if=testfile of=/dev/null bs=1M iflag=direct" && \
rm testfile
Below are the results of the previous benchmark.
S10
| Command | Mean [s] | Min [s] | Max [s] |
|---|---|---|---|
| gzip random | 3.291 ± 0.008 | 3.281 | 3.305 |
| gzip zeros | 1.946 ± 0.067 | 1.871 | 2.076 |
| zero 2 null | 0.111 ± 0.014 | 0.090 | 0.135 |
| zero 2 file | 0.988 ± 0.022 | 0.967 | 1.029 |
| file 2 null | 0.129 ± 0.012 | 0.122 | 0.164 |
Tab S8+
| Command | Mean [s] | Min [s] | Max [s] |
|---|---|---|---|
| gzip random | 3.164 ± 0.005 | 3.156 | 3.174 |
| gzip zeros | 0.492 ± 0.005 | 0.484 | 0.503 |
| zero 2 null | 0.091 ± 0.003 | 0.085 | 0.099 |
| zero 2 file | 0.501 ± 0.027 | 0.458 | 0.541 |
| file 2 null | 0.089 ± 0.005 | 0.082 | 0.109 |
S24
| Command | Mean [s] | Min [s] | Max [s] |
|---|---|---|---|
| gzip random | 2.253 ± 0.028 | 2.206 | 2.298 |
| gzip zeros | 0.450 ± 0.125 | 0.357 | 0.727 |
| zero 2 null | 0.054 ± 0.009 | 0.036 | 0.071 |
| zero 2 file | 0.132 ± 0.017 | 0.104 | 0.161 |
| file 2 null | 0.040 ± 0.006 | 0.026 | 0.053 |
QEMU & Alpine Linux
Here, we're going to measure how long it takes to boot Alpine Linux by setting different values to QEMU's acceleration parameter.
Before moving forward, make sure you have a backup of the disk image file. Once we finish the benchmarks, we're going to restore the disk image from the backup because the image used in the benchmark will become unusable.
Let's start by booting Alpine Linux. Log in, switch to the root user (sudo su), and run the command below this paragraph, which is a variation of this answer. Then run the poweroff command to shut down the system. This update will make Alpine Linux shut down immediately after it finishes booting.
cat > /etc/init.d/boot-poweroff <<HEREDOC && chmod +x /etc/init.d/boot-poweroff && rc-update add boot-poweroff default
#!/sbin/openrc-run

description="Instantly poweroff"

depend() {
    after *
}

start() {
    poweroff -n -f
}
HEREDOC
Now, start the benchmark process where we're going to measure how long it takes to boot Alpine Linux using different values for QEMU's accelerator parameter.
QEMU_COMMAND='qemu-system-x86_64 -m 1024 -cpu max -nographic -display none -drive if=virtio,format=qcow2,file=alpine-3.21.3-x86_64.qcow2' && \
hyperfine \
  --export-markdown benchmark.md \
  --command-name "no accel" \
  --command-name "tcg" \
  --command-name "tcg 64" \
  --command-name "tcg 128" \
  --command-name "tcg 256" \
  --command-name "tcg 512" \
  --command-name "multi" \
  --command-name "multi 64" \
  --command-name "multi 128" \
  --command-name "multi 256" \
  --command-name "multi 512" \
  "${QEMU_COMMAND}" \
  "${QEMU_COMMAND} -accel tcg" \
  "${QEMU_COMMAND} -accel tcg,tb-size=64" \
  "${QEMU_COMMAND} -accel tcg,tb-size=128" \
  "${QEMU_COMMAND} -accel tcg,tb-size=256" \
  "${QEMU_COMMAND} -accel tcg,tb-size=512" \
  "${QEMU_COMMAND} -accel tcg,thread=multi" \
  "${QEMU_COMMAND} -accel tcg,thread=multi,tb-size=64" \
  "${QEMU_COMMAND} -accel tcg,thread=multi,tb-size=128" \
  "${QEMU_COMMAND} -accel tcg,thread=multi,tb-size=256" \
  "${QEMU_COMMAND} -accel tcg,thread=multi,tb-size=512"
Below are the results of the previous benchmark.
S10
| Command | Mean [s] | Min [s] | Max [s] |
|---|---|---|---|
| no accel | 263.132 ± 2.027 | 260.076 | 266.268 |
| tcg | 262.580 ± 1.581 | 260.145 | 264.323 |
| tcg 64 | 134.459 ± 1.053 | 133.011 | 135.767 |
| tcg 128 | 134.601 ± 1.346 | 131.871 | 136.281 |
| tcg 256 | 130.821 ± 1.417 | 127.768 | 132.964 |
| tcg 512 | 263.047 ± 1.528 | 259.954 | 264.834 |
| multi | 268.453 ± 4.896 | 260.118 | 273.295 |
| multi 64 | 135.278 ± 1.215 | 133.404 | 138.026 |
| multi 128 | 133.111 ± 0.984 | 131.444 | 134.416 |
| multi 256 | 130.018 ± 1.337 | 127.972 | 131.642 |
| multi 512 | 261.444 ± 1.484 | 258.898 | 263.634 |
Tab S8+
| Command | Mean [s] | Min [s] | Max [s] |
|---|---|---|---|
| no accel | 102.830 ± 1.029 | 100.267 | 103.840 |
| tcg | 103.333 ± 0.527 | 102.523 | 103.898 |
| tcg 64 | 83.956 ± 6.616 | 80.569 | 102.683 |
| tcg 128 | 81.207 ± 0.602 | 80.134 | 82.164 |
| tcg 256 | 79.594 ± 0.498 | 78.935 | 80.569 |
| tcg 512 | 102.858 ± 0.491 | 101.860 | 103.690 |
| multi | 103.341 ± 0.861 | 101.845 | 104.227 |
| multi 64 | 82.179 ± 1.152 | 80.360 | 84.330 |
| multi 128 | 80.788 ± 0.617 | 79.660 | 81.607 |
| multi 256 | 79.428 ± 0.707 | 77.929 | 80.079 |
| multi 512 | 102.104 ± 0.598 | 100.763 | 103.138 |
S24
| Command | Mean [s] | Min [s] | Max [s] |
|---|---|---|---|
| no accel | 81.565 ± 3.238 | 76.254 | 85.004 |
| tcg | 85.505 ± 0.821 | 84.393 | 86.848 |
| tcg 64 | 65.404 ± 2.664 | 62.448 | 69.785 |
| tcg 128 | 69.566 ± 1.185 | 68.190 | 70.990 |
| tcg 256 | 71.247 ± 2.131 | 69.761 | 76.990 |
| tcg 512 | 84.454 ± 2.027 | 82.643 | 89.631 |
| multi | 82.885 ± 4.161 | 75.824 | 87.478 |
| multi 64 | 74.087 ± 0.987 | 72.827 | 76.002 |
| multi 128 | 70.120 ± 1.277 | 68.652 | 72.099 |
| multi 256 | 71.104 ± 0.683 | 70.060 | 72.256 |
| multi 512 | 84.439 ± 0.639 | 83.471 | 85.473 |
Docker
In this section, we're going to measure how long it takes to run a container from the hello-world image. The Docker daemon will be running in Alpine Linux, while the Docker client will be running in Termux.
hyperfine \
  --warmup 2 \
  --export-markdown benchmark.md \
  --command-name "hello-world" \
  'docker --host localhost:2375 run hello-world'
Below are the results of the previous benchmark.
| Device | Mean [s] | Min [s] | Max [s] |
|---|---|---|---|
| S10 | 17.264 ± 0.995 | 15.845 | 18.946 |
| Tab S8+ | 10.058 ± 0.395 | 9.305 | 10.557 |
| S24 | 7.383 ± 0.361 | 6.779 | 7.767 |
Wrapping Up
Congratulations! You now have a portable Linux environment right in your pocket! This lets you practice, code, handle operations tasks, and all sorts of stuff. It's no personal computer, but if all you've got is an Android, it's a game-changer. I hope you found this as helpful as I did while writing it. Now go and explore!
Take care and until next time!