This post is part of the series "Linux Playground From Scratch"
- Virtual Debian: A Practical Step-by-Step Guide From Scratch
- Alpine in QEMU: A Practical Guide From Scratch
- VirtualBox: Running Pre-Built Debian and Alpine Images
- Installing Debian in VirtualBox: A Step-by-Step Guide
- Termux: Your Pocket-Sized Linux on Android
- Essential Command-Line Tools for Linux: A Practical Guide
This post will be short, but I've tried to compensate by including several screenshots. We will cover how to create a virtual machine and install Debian OS using VirtualBox. I'll describe two methods for installing Debian: a guided installation where you specify your preferences during the process, and an unattended installation where you predefine those preferences in a configuration file for the OS installation.
Create the Virtual Machine
Before installing any OS, we need to create the VM in which it will run. The first step is to download the operating system's CD ISO image file, which we'll use for the installation. To replicate the setup from our previous post, we'll use the same bullseye version. Download the debian-11.11.0-amd64-netinst.iso image. Optionally, download the SHA256SUMS file to verify the integrity of the downloaded image using checksums.
You can use the following command to download both files.
curl --location --remote-name-all "https://cdimage.debian.org/cdimage/archive/11.11.0/amd64/iso-cd/{debian-11.11.0-amd64-netinst.iso,SHA256SUMS}"
The following command can be used to check the disk image integrity.
sha256sum --check --ignore-missing SHA256SUMS
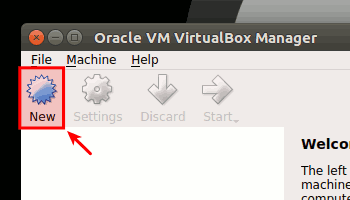
Once you've downloaded the files and verified their integrity, open VirtualBox and create the virtual machine.
A pop-up window will appear, prompting you to create the virtual machine. In this window, select "Linux" as the type, "Debian (64-bit)" as the version, and the "Create a virtual hard disk now" option. You can choose any name you like. While the minimum required memory is "256 MiB", consider allocating at least "512 MiB" or even "1024 MiB" if you plan to run containers.

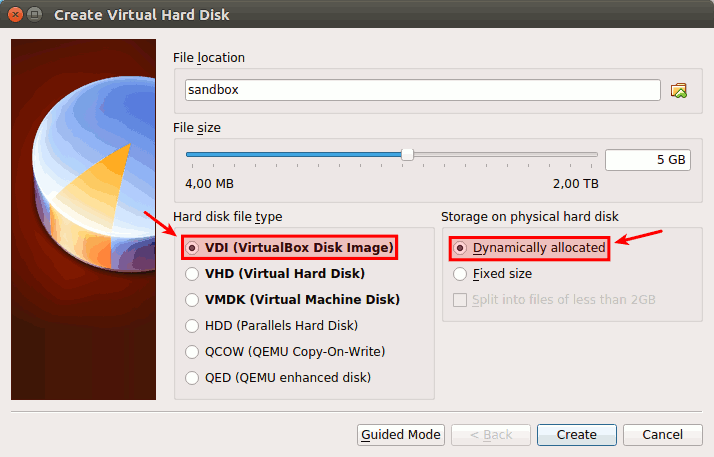
Next, a pop-up window will appear to create the virtual hard drive. Select "VDI (VirtualBox Disk Image)" and "Dynamically allocated". Again, you can choose any name you prefer. Because the disk is dynamically allocated, the file size can be set to the recommended "30 GiB". For reference, the disk space used by the installation in this post was approximately 900 MiB.
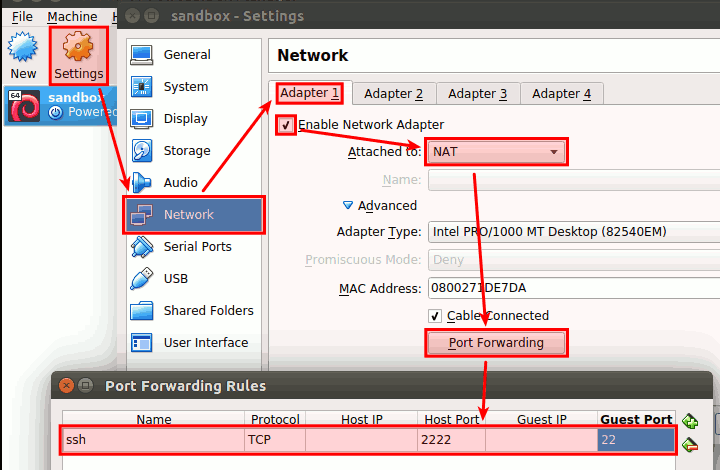
Once the virtual machine is created, ensure that the virtual network interface is enabled. To do this, select the virtual machine, click the "Settings" button, and go to the "Network" section. Check the box to enable network adapter #1 and select the desired network mode. "NAT" is generally a safe choice. If you select "NAT", also configure port forwarding from host port 2222 to guest port 22 to enable access via SSH.
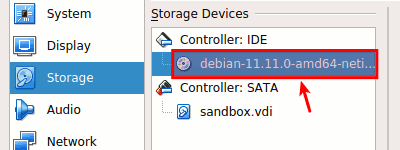
The final step before OS installation is to load the CD image. In the settings pop-up window, navigate to the "Storage" section. For the empty IDE device, click the CD icon to load the disk image file you downloaded earlier.

Once the image is loaded, the IDE device will display the name of the disk image file.
With the preceding steps completed, the virtual machine is ready for the OS installation. Start the VM and choose your preferred installation method: guided or unattended.
Guided Installation
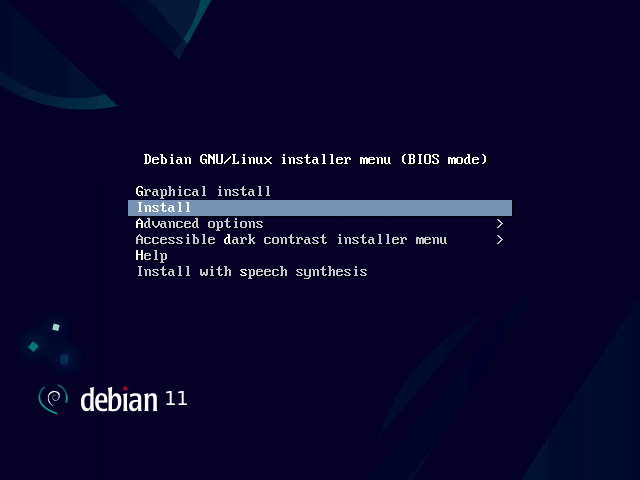
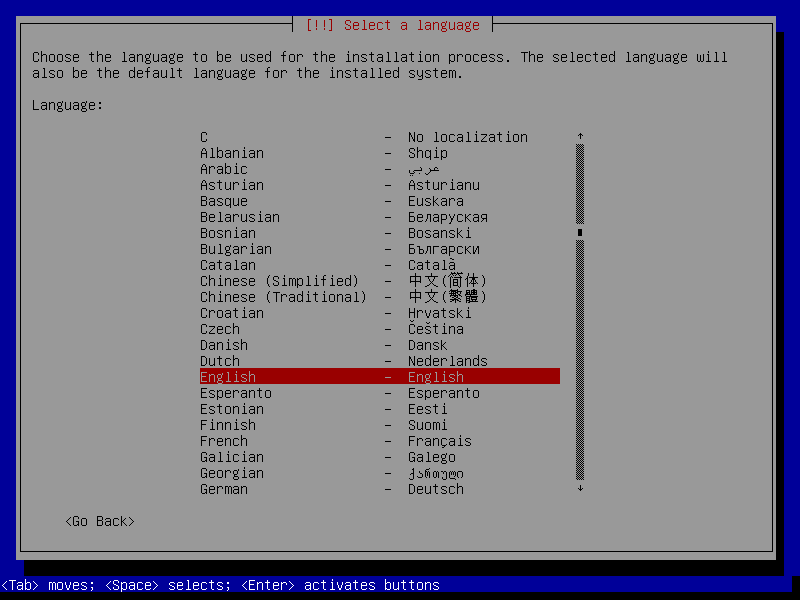
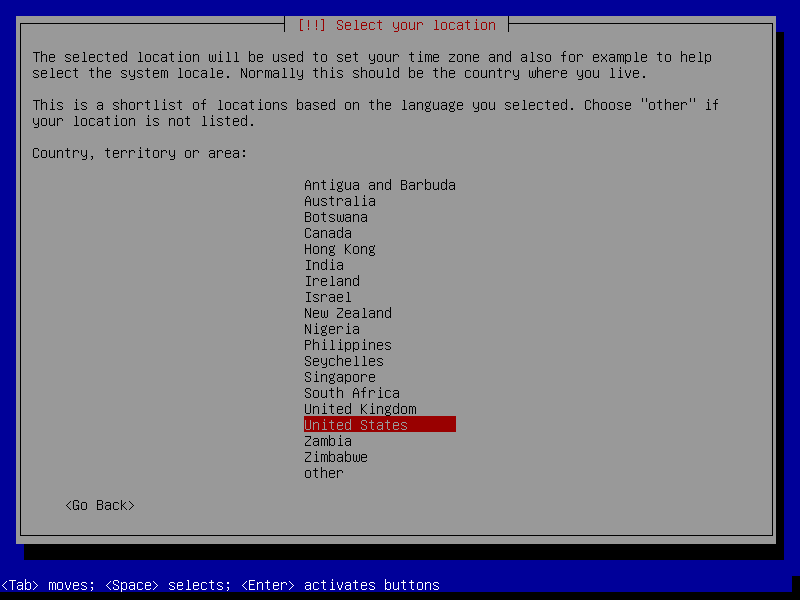
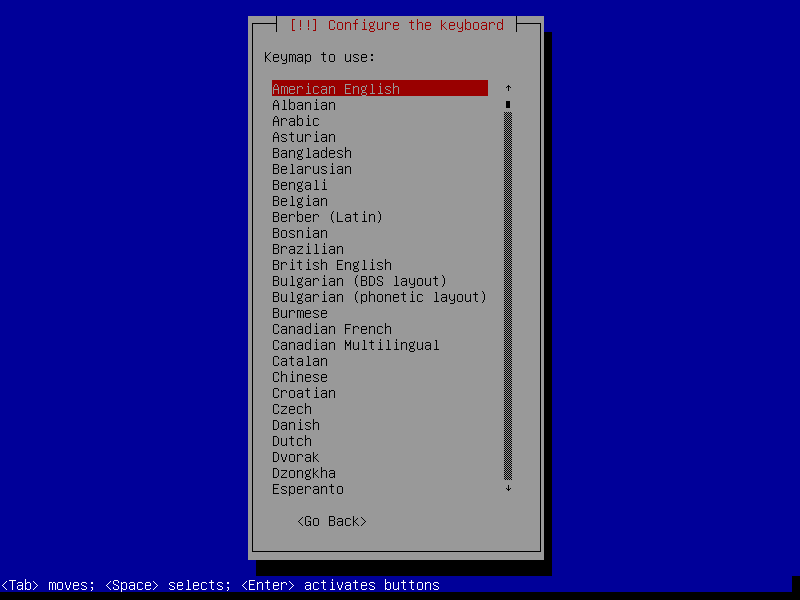
The guided installation is straightforward but requires careful attention to select the correct options at each step. Below is a summary of the steps, followed by screenshots for reference.
- System boot: Select the "Install" option.
- System localization: Set the language, location and keyboard.
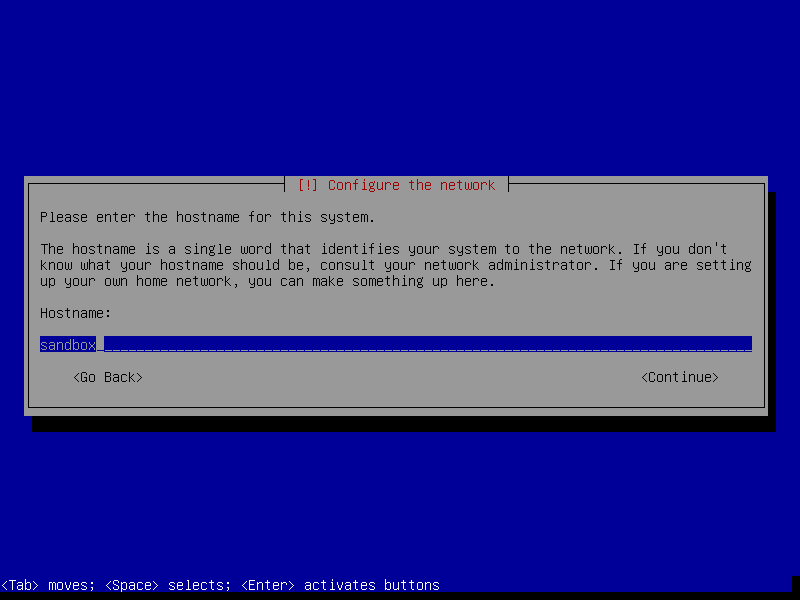
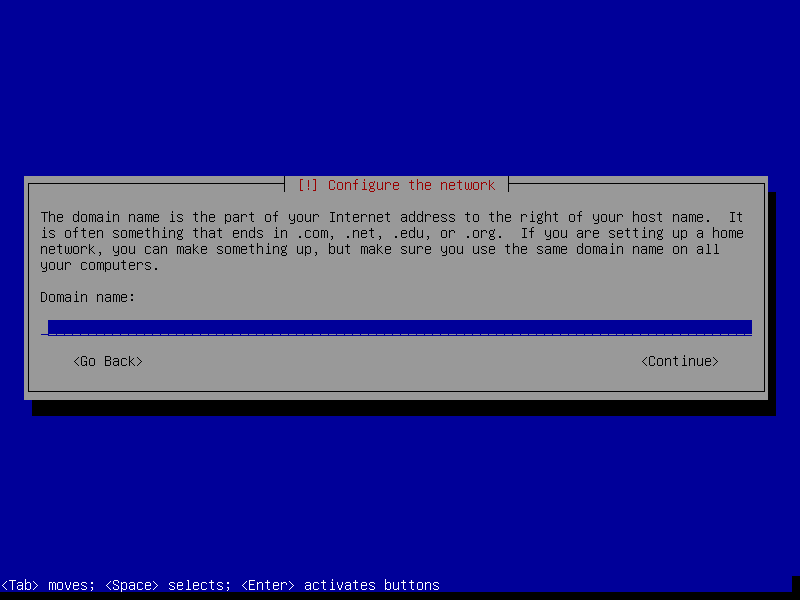
- Network: Set a host name and ignore the domain name.
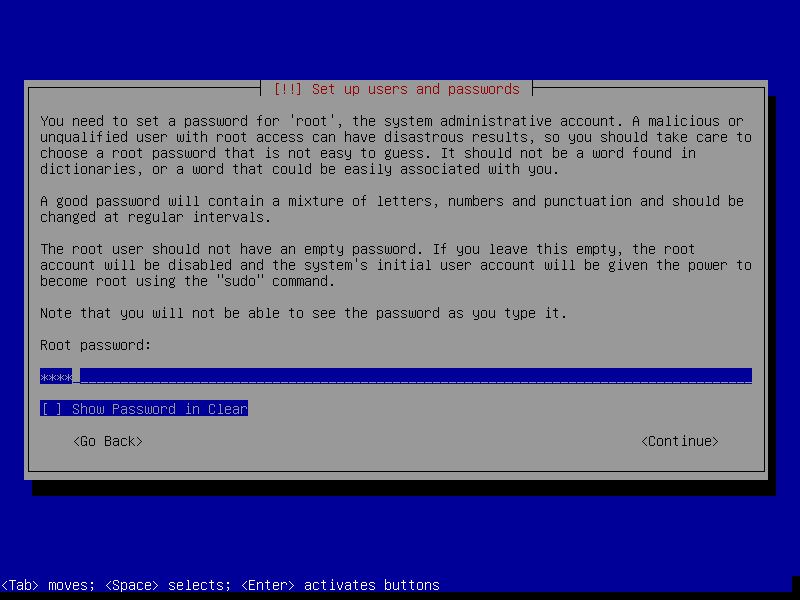
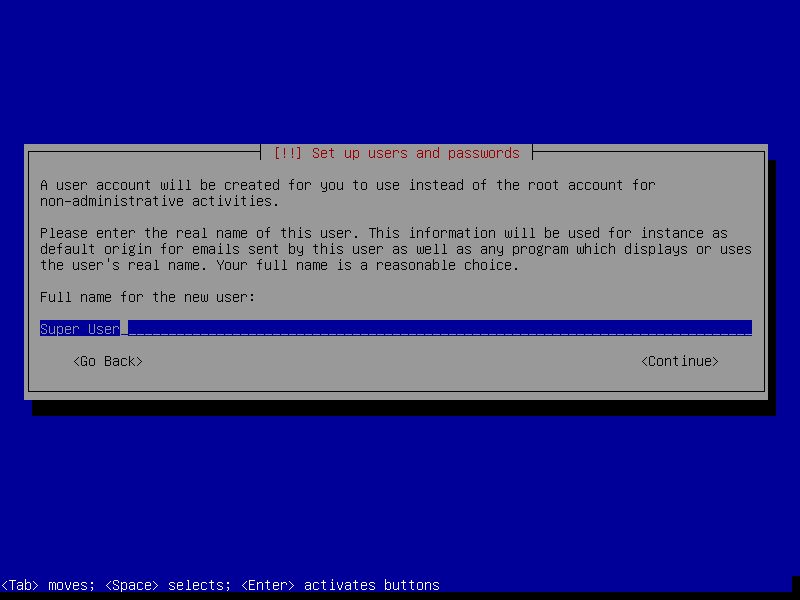
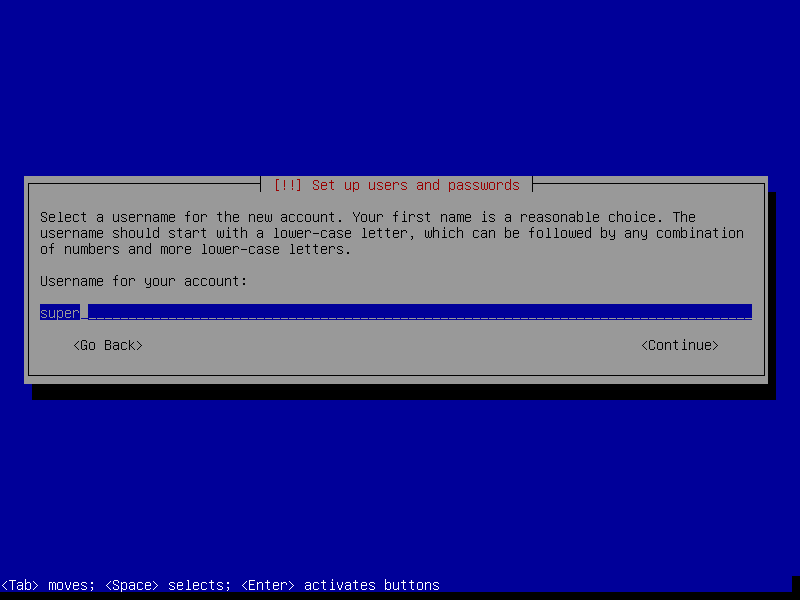
- Users: Set root password and admin (name, user name and password).
- Disk partition process:
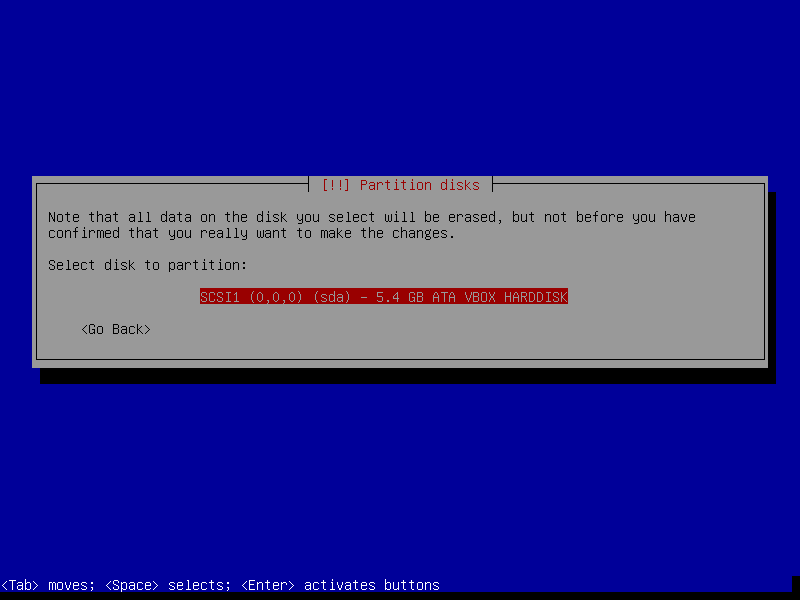
- Method: Select "Guided - use entire disk".
- Disk: (Select the only option) "SCSI1 (0,0,0) (sda) - 5.4 GB ATA VBOX HARDDISK".
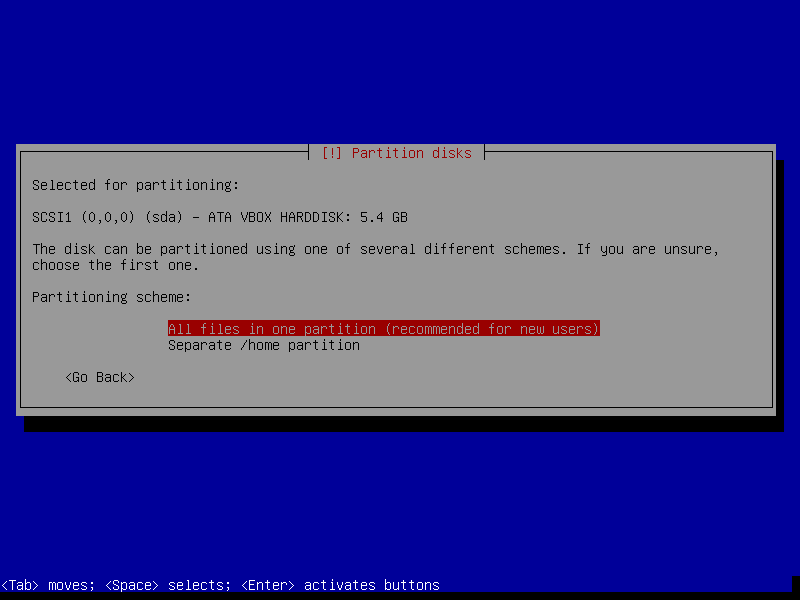
- Partitioning scheme: Select "All files in one partition".
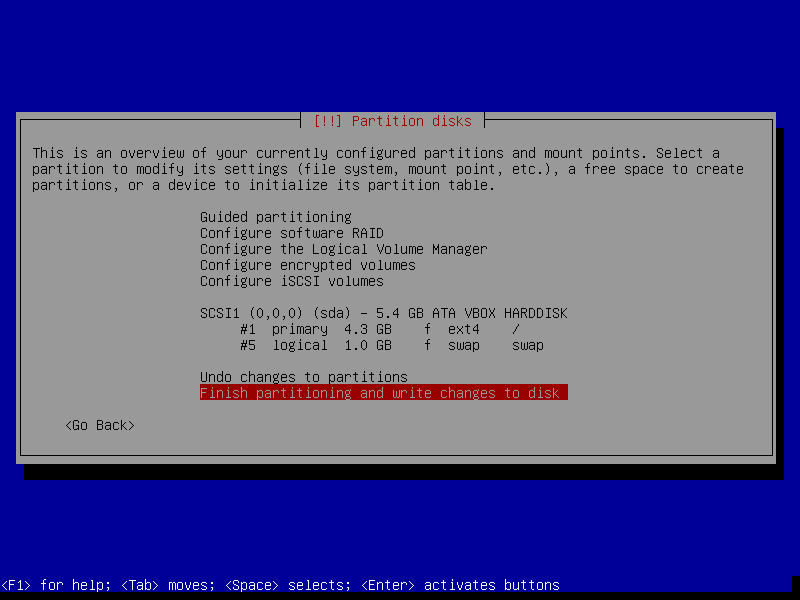
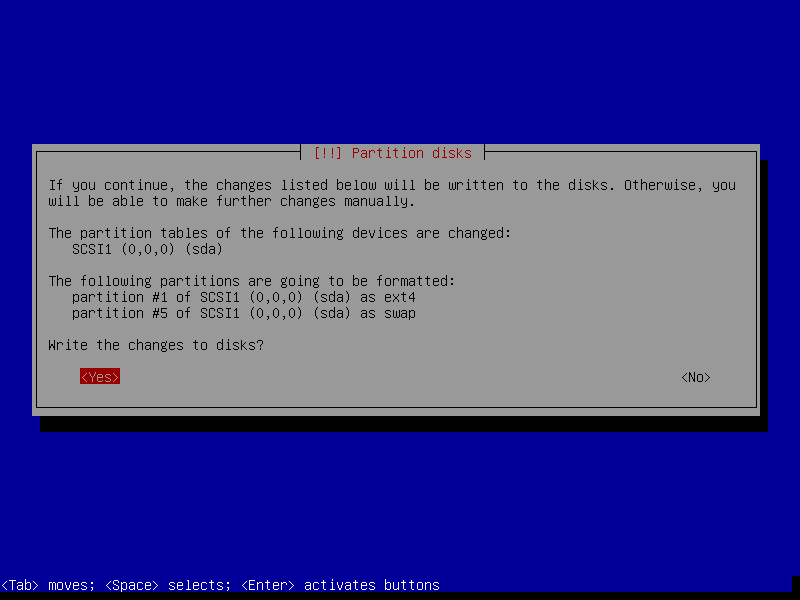
- Finish partitioning by selecting "Finish partitioning and write changes to disk".
- Confirm by answering "Yes" to the "Write the changes to disk?" prompt.
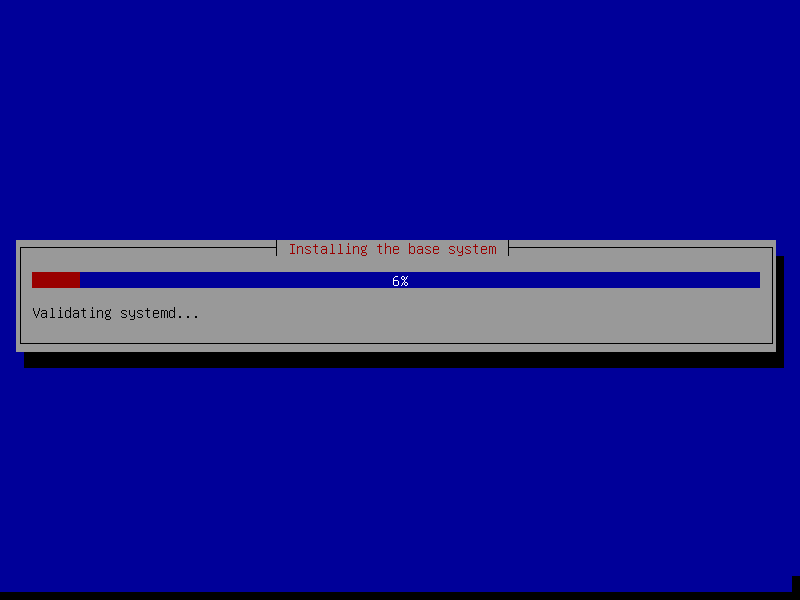
- Progress bar that shows the installation progress of the base system.
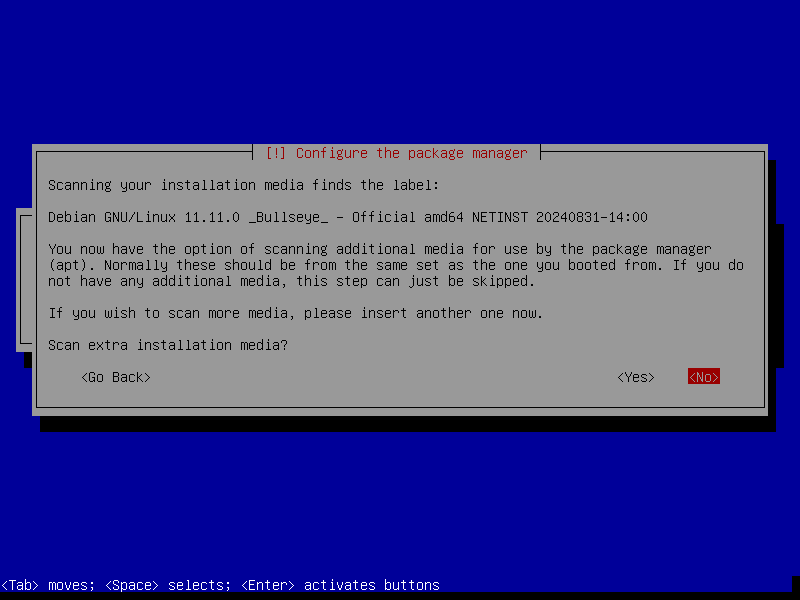
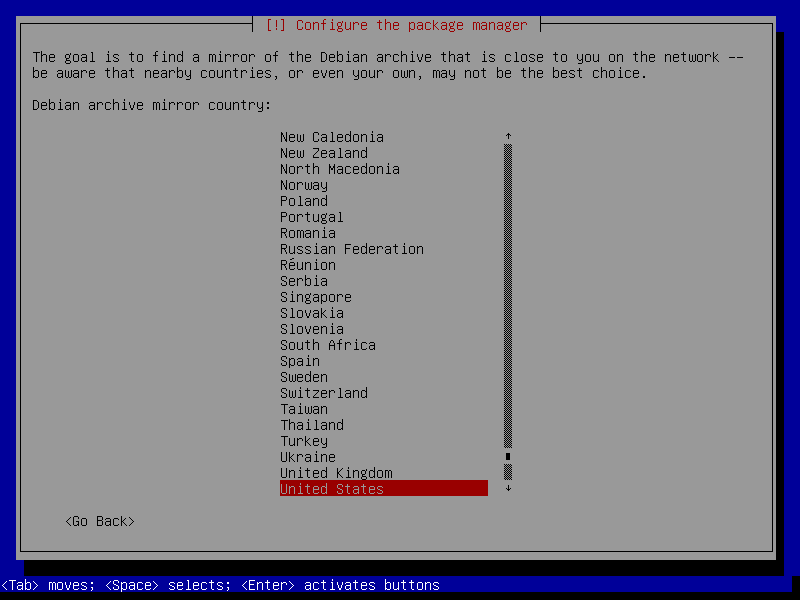
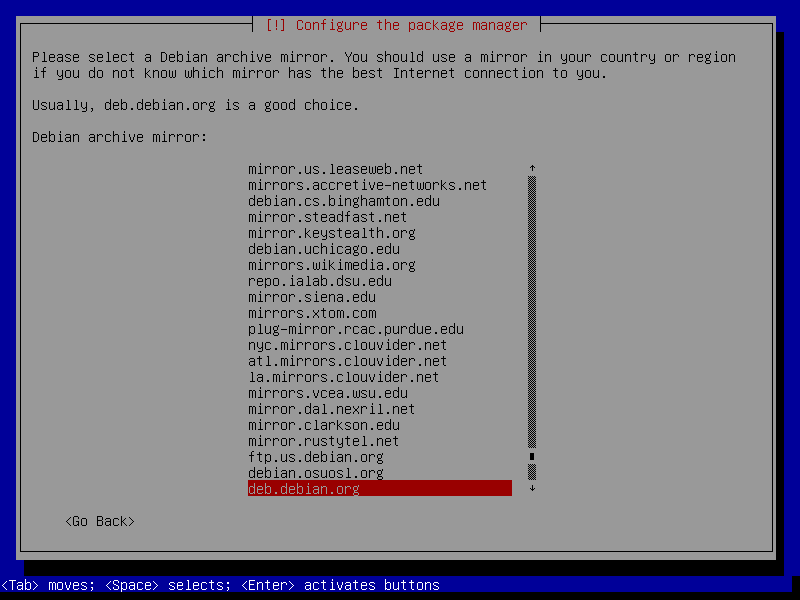
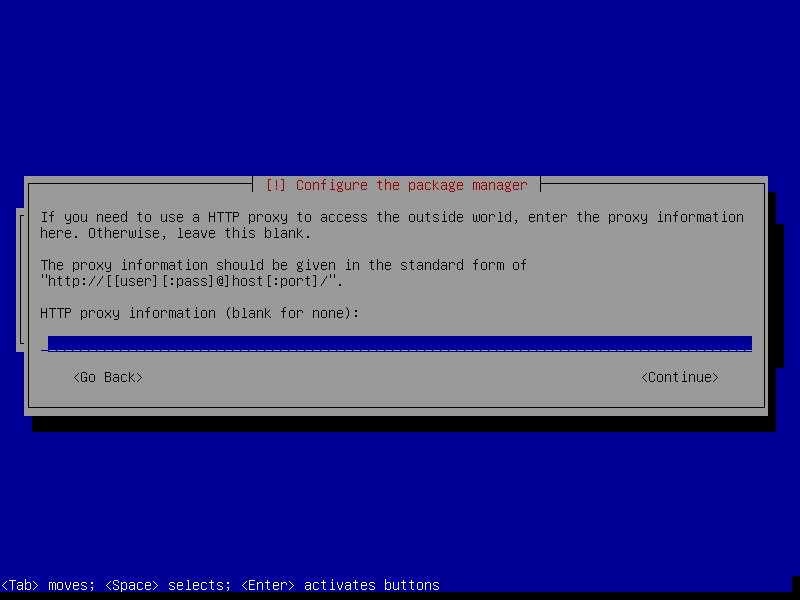
- Package manager: Do not scan extra installation media, leave default options for archive mirrors and do not set a proxy (leave empty).
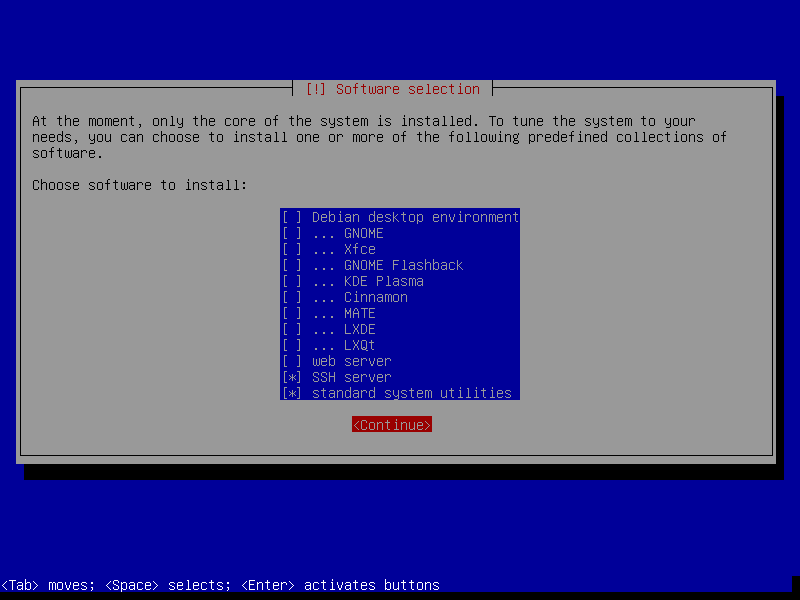
- Software: Only select SSH server and standard system utilities.
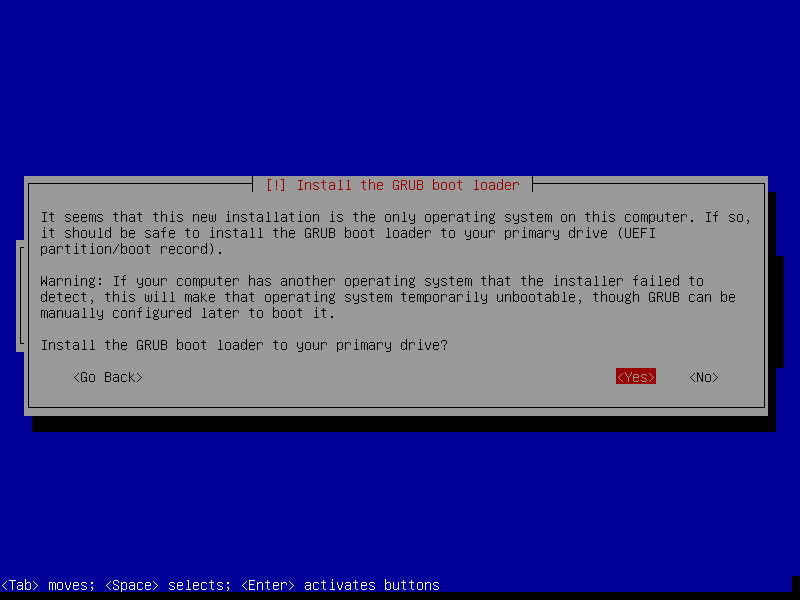
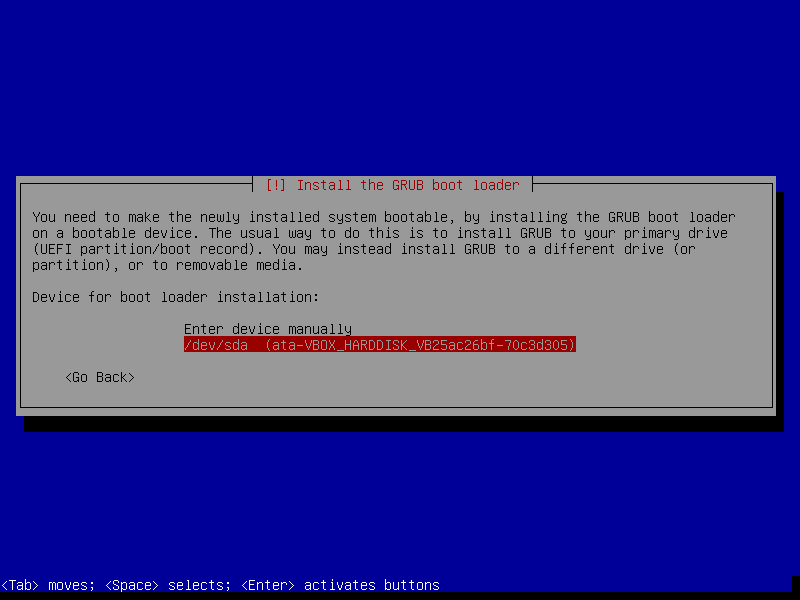
- Boot loader: Install it on the primary device
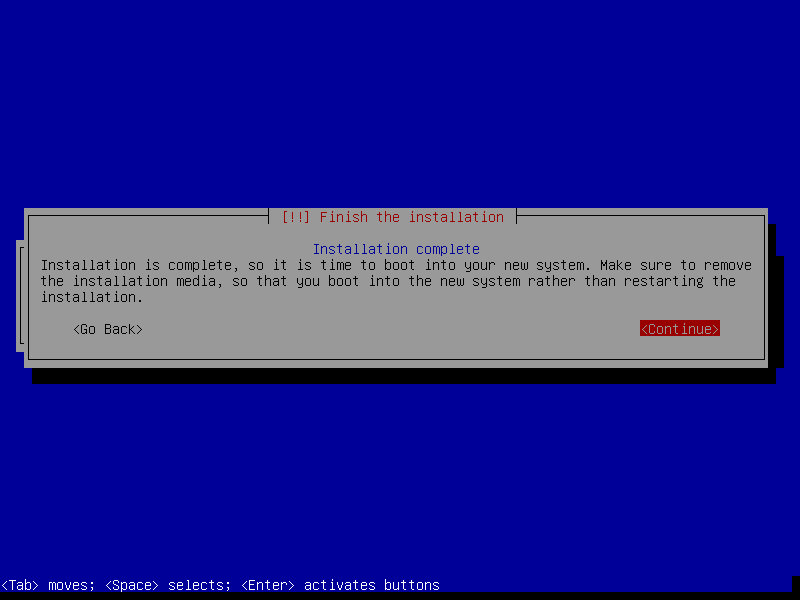
/dev/sda. - Finish the installation: Hit "Continue" to reboot system.
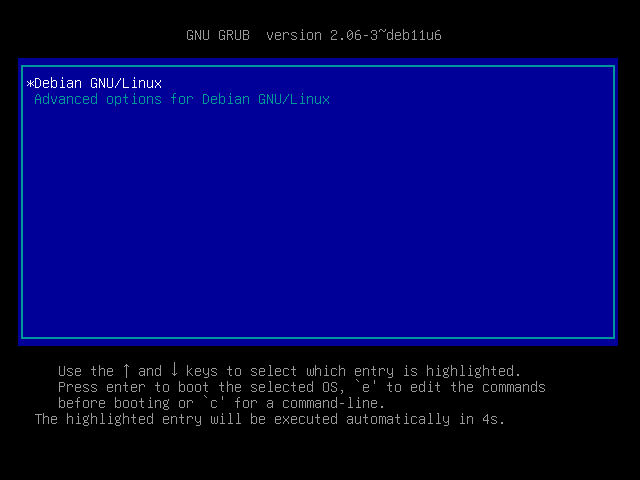
- Boot fresh installed Debian OS.
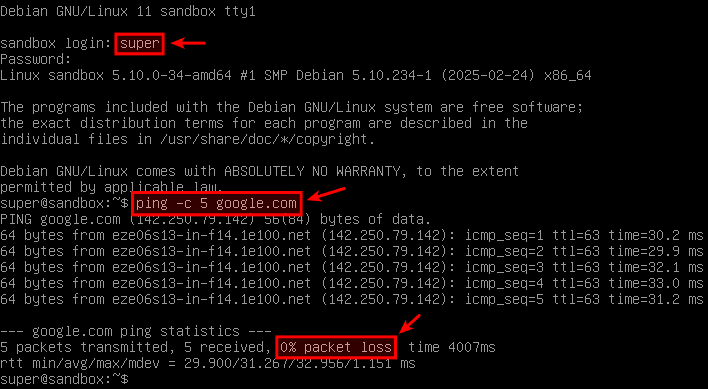
- Login with admin user and check if it can reach the internet.

Unattended Installation
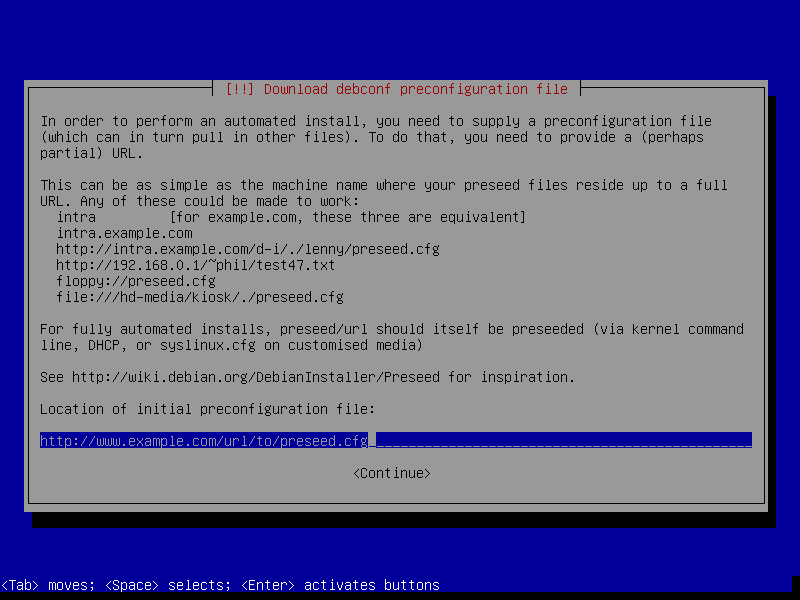
The unattended installation offers a faster approach, requiring a preconfiguration file with the settings you would normally choose interactively. You can find an example of such a file here. This file is required before starting the installation. Once started, the process is fully automated: you won't need to interact with it until the installation completes, the virtual machine restarts, and you see the login prompt. If you're interested, I've uploaded the preseed file that I used for this post.
For more information, consult the official Preseed documentation. Note that while pre-seeding from a floppy disk is listed as an option, it doesn't work.
Below is a summary of the unattended installation steps, followed by screenshots for reference.
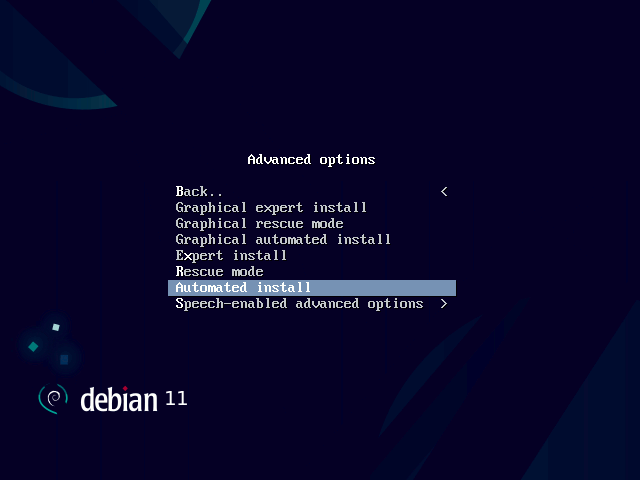
- System boot: Select "Advanced options", then "Automated install".
- Preconfiguration file: enter the URL where the preseed file is located.
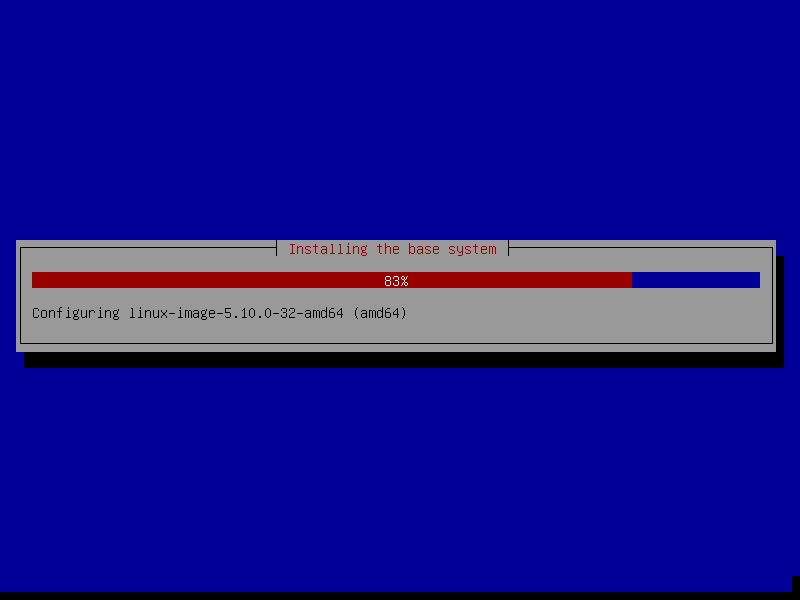
- Progress bar that shows the installation progress.
- Boot fresh installed Debian OS.
- Login with root and create the admin user with the following command
adduser admin


System Setup
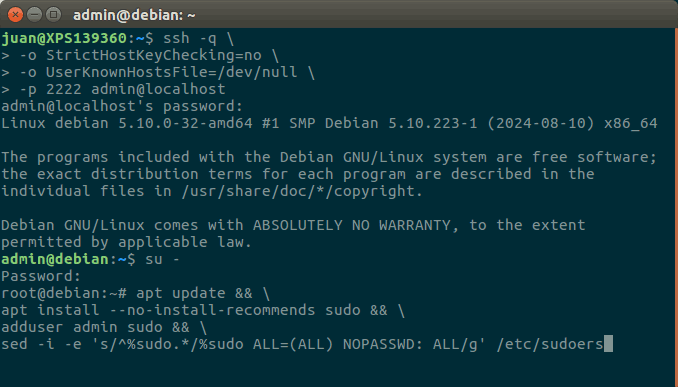
After either installation method, I recommend installing sudo to simplify system administration tasks. Assuming you're logged in as the admin user via SSH, switch to the root user with:
su -
Next, update the package repository, install "sudo", add the admin user to the "sudo" group, and configure the system to allow password-less execution of commands for members of this group. Below is the command to accomplish this, followed by a screenshot for reference.
apt update && \
apt install --no-install-recommends sudo && \
adduser admin sudo && \
sed -i -e 's/^%sudo.*/%sudo ALL=(ALL) NOPASSWD: ALL/g' /etc/sudoers
Now you can install any applications you need. I suggest reviewing the recommended apps that were installed in the previous post.
Virtual Hard Disk Backup
As a final step, let's back up the virtual hard drive. This allows you to quickly create a new virtual machine with a fresh Debian installation if something goes wrong, or to share the disk backup with others. Below are the commands I used. Remember to adapt these commands to your specific file locations and names. This will result in a "VDI" file compressed with bzip2.
cd ~/VirtualBox \VMs/sandbox/
bzip2 --keep sandbox.vdi
mv sandbox.vdi.bz2 /path/to/backup/disk/image/
Wrapping Up
Well done! You've successfully installed Debian in VirtualBox. Now you have a virtual environment where you can safely experiment with the command line, explore the GNU/Linux ecosystem, and set up your development tools. I hope this tutorial has been a valuable resource for you. Happy hacking!
Take care and until next time!